

How To Clean Up A Drawing In Photoshop
I sometimes get questions on how I digitalize my images. I ever draw by hand, and very little of my fine art is fabricated with imaging software. Notwithstanding, a bit of touching-up is needed when you prepare an image for posting online. This will be a quick tutorial on how to employ Photoshop to clean up a photo (I don't take a scanner) of an ink cartoon and make it look adept for publishing on social media and/or websites.
I am not an expert on imaging software, but I've washed quite a bit of trial and error on this, so I hope you find my communication helpful. I am sure there are many other ways of achieveing the same result, merely this works for me. Feel free to post any tips and tricks in the comment section.
While I use Photoshop for this tutorial, I'm sure there are many similar programs that can be used to the aforementioned purpose.
Tools for drawing
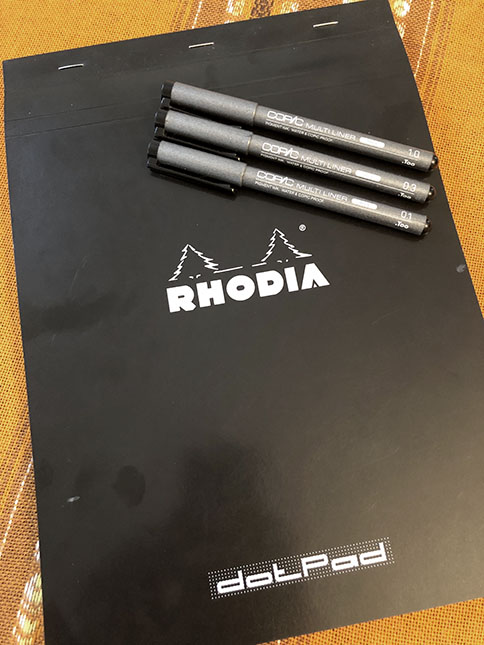
I sometimes get questions on what tools I utilise for my drawings, so let'due south start with that. My favorite cartoon newspaper is Rhodia Dot Pad. The texture of the paper is smooth, and I savour how ink markers behave on information technology. The dots are subtle, only I find them very useful for my way of art.
My preferred markers are Multiliners from Copic, even so other brands like Pigma Micron and Uni Pivot are also groovy pens.
Step 1 – take a photo of your drawing
I use a iPhone 8 to take the picture. Always try to have the photo in daylight, close to a window, and with several other light sources in the room (merely switch on all your lamps). Daylight volition make a lot of deviation, as you tin can see from the below pictures (however in this tutorial I will piece of work with the "No daylight" image, to show you that fifty-fifty that one can be cleaned up).
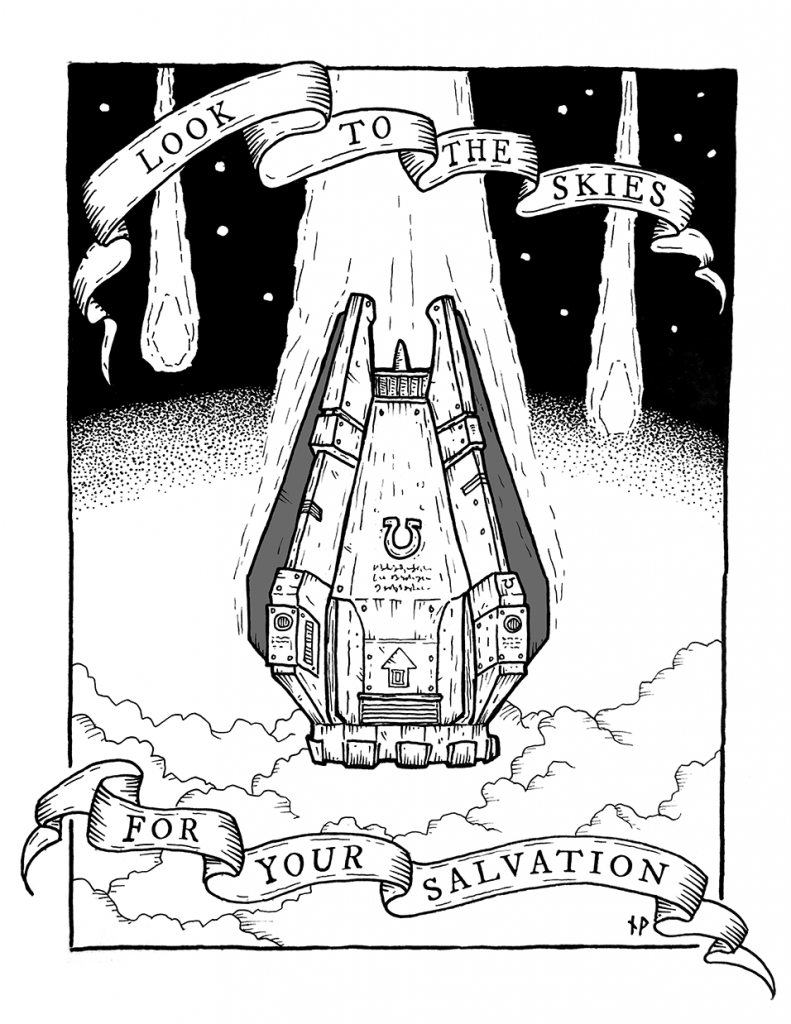
I picked a drawing I made of a space marine drop pod assault from the Warhammer 40.000 universe.

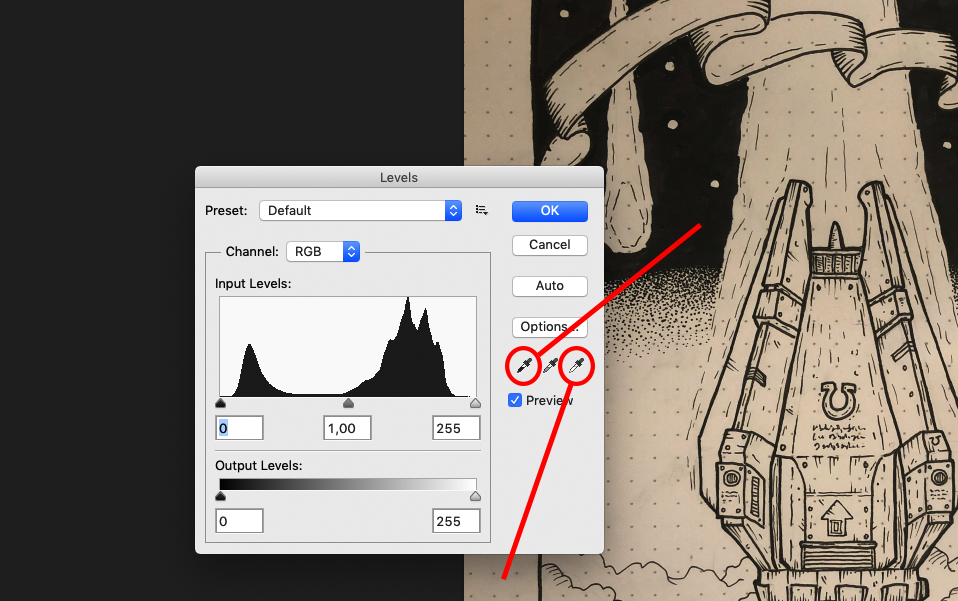
Step 2 – adjust levels
Later on cropping the paradigm to your liking, go to paradigm > adjustements > levels (or just hit control+L on a Mac).
Cull the black droplet tool and click the brightest black yous can notice in your drawing. This will make all black uniformly dark, and hide brush strokes and like unintended variations.
Choose the white droplet tool and click the darkest white you tin can observe in your drawing. This volition brand greyness and yellowish tones uniformly white.
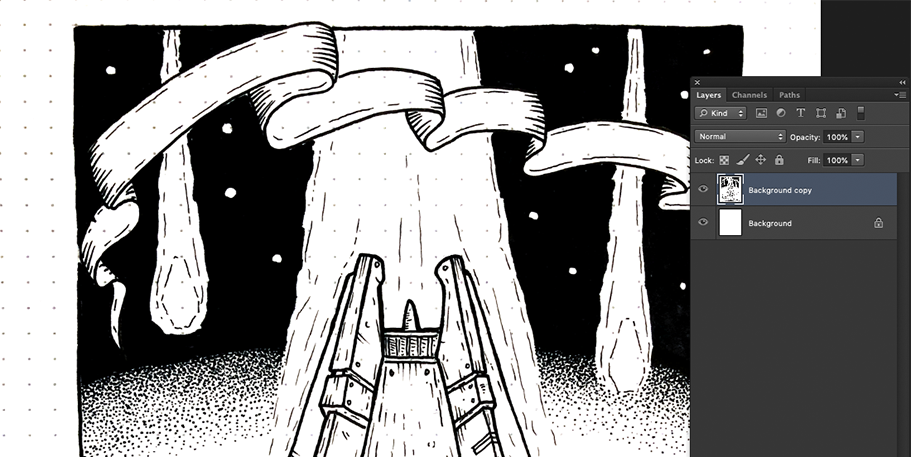
Step three – create a new layer for the drawing
Click the background layer, and drag it to the "create new layer" button in the bottom of the layer console (or just hitting Control+A, Command+C, Command+Five) to create a new layer with the drawing, then make full the background layer with white.
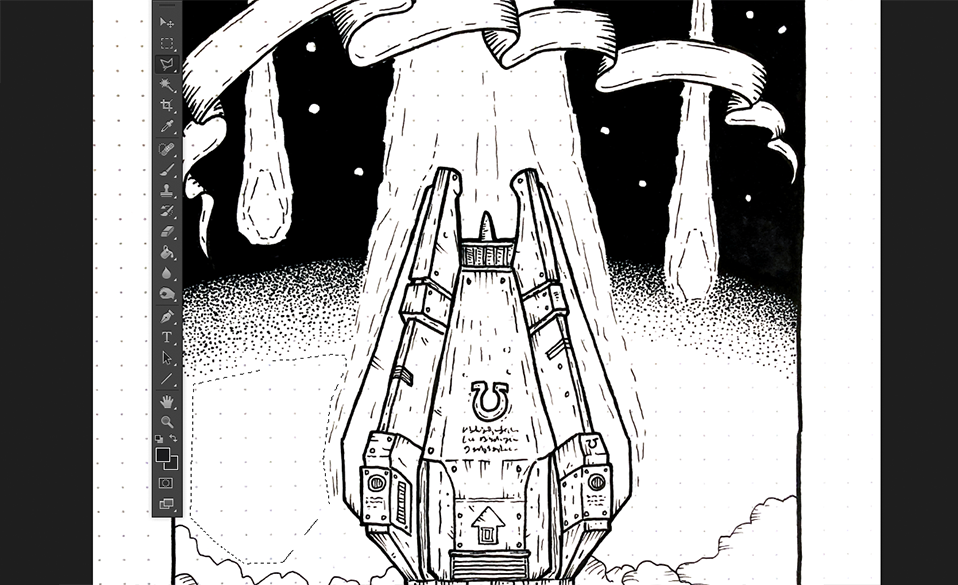
Step 4 – erase the grid/dots
Use the polygonal lasso tool (L) to select large white areas in the drawing, and hit delete to go rid of the dots. So use the eraser tool to remove the remaining dots that was hard to go with the lasso.
This will take some time, so be patient.
I've tried some other ways to get rid of the dots, for example by adjusting blending options in the layer, but in my experience this compromises the details in the cartoon. Therefore I prefer to do information technology this way even if it's a bit time consuming. Only put on a practiced album on Spotify and go to work.
Pace five – finishing upward
When all dots are removed and you're happy, go ahead and flatten the image. I tend likewise to change the image mode from RGB to grayscale to make sure I get rid of whatsoever color information in the image (and to reduce file size).
I've added some text to the banners in this image, since my handwriting doesn't really fit the style. I also added some greyness to the fins in the background.
Finally adjust the size of the image, and salvage it as a PNG file (to avoid pinch and reduced quality)
I hope y'all enjoyed this tutorial and found it helpful. Skillful luck and go along drawing! Make sure to follow me on Instagram, where I post more images, maps and tips: https://world wide web.instagram.com/paths.peculiar/
More than tutorials:

Source: https://www.wistedt.net/tutorials/tutorial-how-to-clean-up-an-ink-drawing-in-photoshop/
Posted by: autreysenessobling.blogspot.com
0 Response to "How To Clean Up A Drawing In Photoshop"
Post a Comment